Open the swap page
You’ll see two boxes: Sell (what you’re spending) and Buy (what
you’re receiving). If nothing is connected yet, the button will say
Connect Wallet.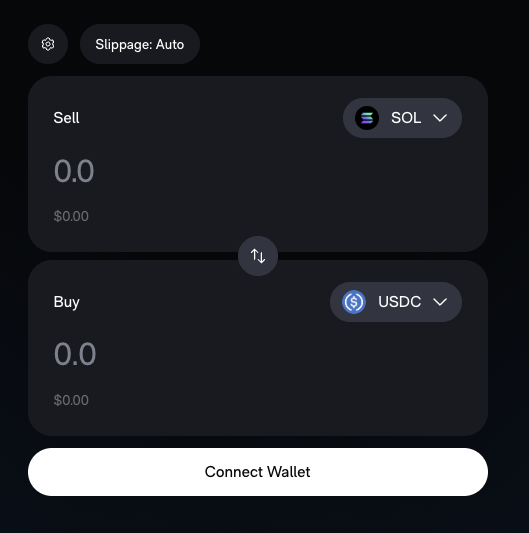
Connect your wallet
Click Connect Wallet, select the wallet you have installed (for
example, Phantom), then approve the connection in your wallet.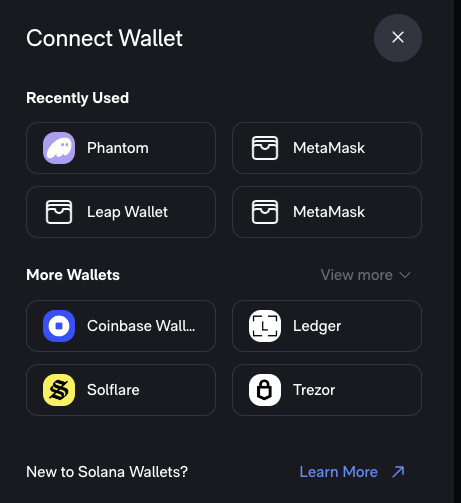
Pick the tokens
In the Sell box, click the token name (for example, SOL) to open
the token picker. Search by name, symbol, or address, then
select the token you want to sell. Repeat in the Buy box.Tip: If you paste a token address, double-check you’re selecting the token
you intended. Symbols can be copied.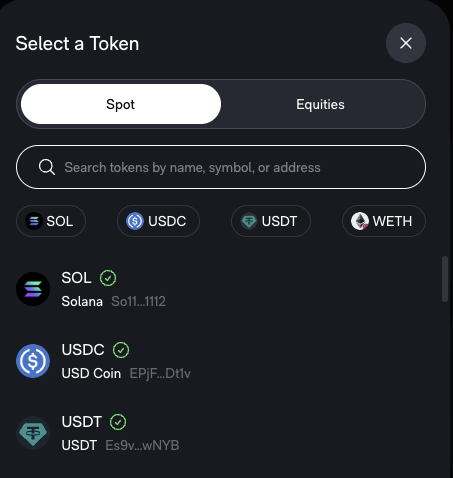
Enter an amount
Type an amount in the Sell box. The Buy amount updates based on the
current quote. To swap direction, use the swap button between the two
boxes.
Review swap settings (optional)
Click the settings icon to open Swap Settings: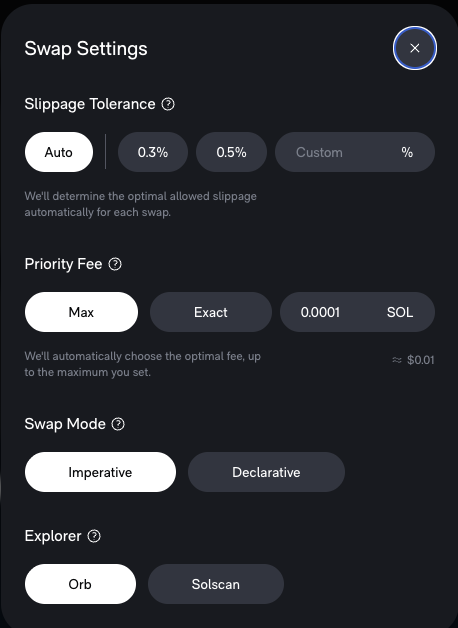
Slippage is the difference between the price you expect and the price
your swap actually executes at. Prices can change between submission and
confirmation because other trades are happening or liquidity is thin.
Slippage tolerance sets how much price movement you’re willing to accept.
If the price moves more than your limit, the swap fails instead of
executing at a worse price. Leaving slippage set to Auto is usually the
safest option.
- Slippage Tolerance: Keep Auto unless you know why you’re changing it. Use Custom only if you understand the risk of a worse price.
- Priority Fee: Controls how aggressively the transaction is sent. Leaving it on the default is fine for most swaps.
- Swap Mode: Imperative for manual control of the route and execution, Declarative for more automated behavior. If you’re new, leave the default.
- Explorer: Choose where you want to view the transaction after it’s sent (for example, Orb or Solscan).
Submit the swap
Click the swap/confirm button (after connecting, this replaces
Connect Wallet). Your wallet opens a transaction preview. Review the
details, then Approve.
Common issues
- Not enough SOL for fees: keep a small SOL balance for network fees.
- Transaction fails: prices may have moved or liquidity may be thin. Try again or reduce size.
- Token doesn’t show up: the swap can succeed even if the wallet UI is slow to refresh. Check the explorer link.